How to make your NextJS + TypeScript project more consistent and less buggy with ESLint, Stylelint & Prettier
Do you want your code to look professional and consistent?
Do you want to catch code issues before pushing to production or sharing with friends, colleagues?
If yes, keep reading!
ESLint, Prettier & StyleLint are tools that help you with those goals, and this post will explain how to set them up in your project.
You can find the final code on Github. If you have any questions, comment or reach out on Twitter 🙂.
Prerequisites:
- Basic Next.js, Typescript, React knowledge.
- How to use a terminal
- Familiarity with Github and npm or yarn
- An IDE (ex: VSCode, Atom, SublimeText, ...)
Let's dive in.
What are ESLint, StyleLint, Prettier, and the difference between the three?
What is ESLint?
ESLint is the most popular linter for Javascript projects.
A linter is a tool that scans your code and detects issues with it. There are many benefits to using a linter :
- you can see harmful code patterns
- you make your code more consistent
- etc.
For a linter to work, it has to know what it should flag. You specify what is OK or not in your code by giving the linter some rules. Whenever your code breaks a rule, the linter will flag it.
For example, you can ask the linter :
- to flag the use of
consolein your code by using the no-console rule - to flag when variables are declared with
varinstead ofletorconstby using the no-var rule - etc...
ESLint already comes with a set of recommended rules, so you don't have to define all the rules by hand. It can also automatically fix some of the issues.
What is StyleLint?
Stylelint is a linter like ESLint, except it works on CSS files vs. Javascript files.
What is Prettier?
Prettier is a code formatter: you write your code, and it formats it, so it is "pretty".
For example, Prettier can turn this line of code :
const blogPost = write({platform: 'hashnode', author: '@joyancefa', title: 'eslint+prettier', tags: ['nextjs', 'typescript']});
into this better formatted code :
const blogPost = write({
  platform: 'hashnode',
  author: '@joyancefa',
  title: 'eslint+prettier',
  tags: ['nextjs', 'typescript'],
});
What is the difference between Prettier and ESLint or Stylelint?
Imagine you're the famous movie actor Leonardo Dicaprio.
You have started shooting a movie with Martin Scorsese, the movie director. You will likely have a stylist working with you to make sure you wear the right make-up, clothes, etc... At the same time, Martin may give you advice about your style, but he will mainly focus on your acting.
Your code is like Dicrapio. Prettier is the stylist, while ESLint or Stylelint is the movie director.
- Prettier is very good at ensuring your code looks good and consistent.
- ESLint/Stylelint can help with the format, but their strength resides in how they help you catch lousy code: variables not used/initialized, unreachable code, invalid CSS, etc...
That's why you need both Prettier + ESLint (+ StyleLint if you have CSS files) 💪🏾.
💡 ESLint, Stylelint, and Prettier only give you suggestions or change the code on your behalf. They can't stop your code from running.
Now that we have seen ESLint, Stylelint, and Prettier, and their differences, let's go ahead and set them up.
Install ESLint, Prettier, and Stylelint
1. Clone the project and navigate into it
Run the following commands :
git clone https://github.com/Joyancefa/first-nextjs-pwa.git
cd first-nextjs-pwa
If you want to know how this project was set up, check my previous article.
2. Install ESLint and some helpers
Run this command on your terminal :
yarn add eslint eslint-plugin-react @typescript-eslint/parser @typescript-eslint/eslint-plugin eslint-plugin-react-hooks --dev
This command will install :
- eslint, the core library
- eslint-plugin-react , which provides React specific linting rules for ESLint
- @typescript-eslint/parser, which allows ESLint to parse the typescript code
- @typescript-eslint/eslint-plugin, which provides the actual rules specific for Typescript. For example,
- eslint-plugin-react-hooks which provides React hooks rules. You don't need this package if you don't use React hooks.
3. Configure eslint
Go to the root directory and add a new file, .eslintrc.js: this file will contain the ESLint configuration.
Paste the following code :
module.exports = {
  parser: '@typescript-eslint/parser', // Tells ESLint to use this parser installed at previous step
  parserOptions: {
    ecmaVersion: 2021, // The version of ECMAScript you are using
    sourceType: 'module', // Enables ECMAScript modules
    ecmaFeatures: {
      jsx: true,
    },
  },
  settings: {
    react: {
      version: 'detect', // Tells eslint-plugin-react to automatically detect the version of React to use
    },
  },
  extends: [
    'plugin:react/recommended', // Specify rules for React
    'plugin:react-hooks/recommended', // Specify rules for React hooks
    'plugin:@typescript-eslint/recommended', // Specify rules for Typescript
  ],
  rules: {
    // This is where you can disable/customize some of the rules specified by the plugins
  },
};
4. Add prettier
Run this command :
yarn add prettier eslint-config-prettier eslint-plugin-prettier --dev
This command will install :
- prettier, the core library
- eslint-config-prettier , which will turn off the unnecessary rules or the rules that might conflict with Prettier.
- eslint-plugin-prettier, which will make Prettier run as an ESLint rule.
5. Configure prettier
As for ESLint, you need to have a configuration file. This will let editors like VSCode know that you're using Prettier.
Go to the root directory and add a new file .prettierrc.js. Paste the following code :
module.exports = {
    semi: true, // Adds a semi-colon after every JS statement
    trailingComma: 'all', // Add a trailing comma whenever possible
    singleQuote: true, // Use single quotes instead of double quotes by default
    printWidth: 100, // Set the preferred line length to 100
};
Feel free to customize the options. You can find all the options here.
6. Integrate Prettier with ESLint
Update the .eslintrc.js file by adding plugin:prettier/recommended at the end of the extends list :
 extends: [
     // ....
     'plugin:prettier/recommended'
]
The config file should look like this afterward:
module.exports = {
  parser: '@typescript-eslint/parser', // Tells ESLint to use this parser installed at previous step
  parserOptions: {
    ecmaVersion: 2021, // The version of ECMAScript you are using
    sourceType: 'module', // Enables ECMAScript modules
    ecmaFeatures: {
      jsx: true,
    },
  },
  settings: {
    react: {
      version: 'detect', // Tells eslint-plugin-react to automatically detect the version of React to use
    },
  },
  extends: [
    'plugin:react/recommended', // Specify rules for React
    'plugin:react-hooks/recommended', // Specify rules for React hooks
    'plugin:@typescript-eslint/recommended', // Specify rules for Typescript
    'plugin:prettier/recommended',
  ],
  rules: {
    // This is where you can disable/customize some of the rules specified by the plugins
  },
};
💡 IMPORTANT: ESLint applies the rules added in the "extends" property in order. So
plugin:prettier/recommendedmust come at the end so Prettier rules are not overridden.
7. Add stylelint
Run this command :
yarn add stylelint stylelint-config-standard stylelint-config-prettier stylelint-order --dev
This command will install :
- stylelint, the core library
- stylelint-config-standard, which enforces some standard rules
- stylelint-config-prettier, which will turn off the unnecessary rules or the rules that might conflict with Prettier.
- stylelint-order, which will enable you to configure some order-related rules.
8. Configure stylelint
Go to the root directory and add a new file .stylelintrc.js. Paste the following code :
module.exports = {
    extends: ['stylelint-config-standard', 'stylelint-config-prettier'],
    plugins: ['stylelint-order'],
    rules: {
        'order/properties-alphabetical-order': true, // Ensure CSS properties are ordered
        'at-rule-no-unknown': [
        true,
        {
            ignoreAtRules: ['tailwind', 'apply', 'variants', 'responsive', 'screen', 'layer'], // Stylelint won't flag if it finds any of these strings
        },
        ],
        'declaration-block-trailing-semicolon': "always", // Ensure there is a semi-colon at the end of a declaration block
    },
};
That's it: you should now have ESLint + Prettier + Stylelint set up for your project 🎉.
Let's go ahead and test the installation.
Test your ESLint, Prettier, and Stylelint installation
1. Run ESLint + Prettier
- Navigate to the root directory and run the following command to lint the
app.tsxfile:
yarn run eslint pages/_app.tsx
If ESLint and Prettier work as expected, you should see the following errors in your console :
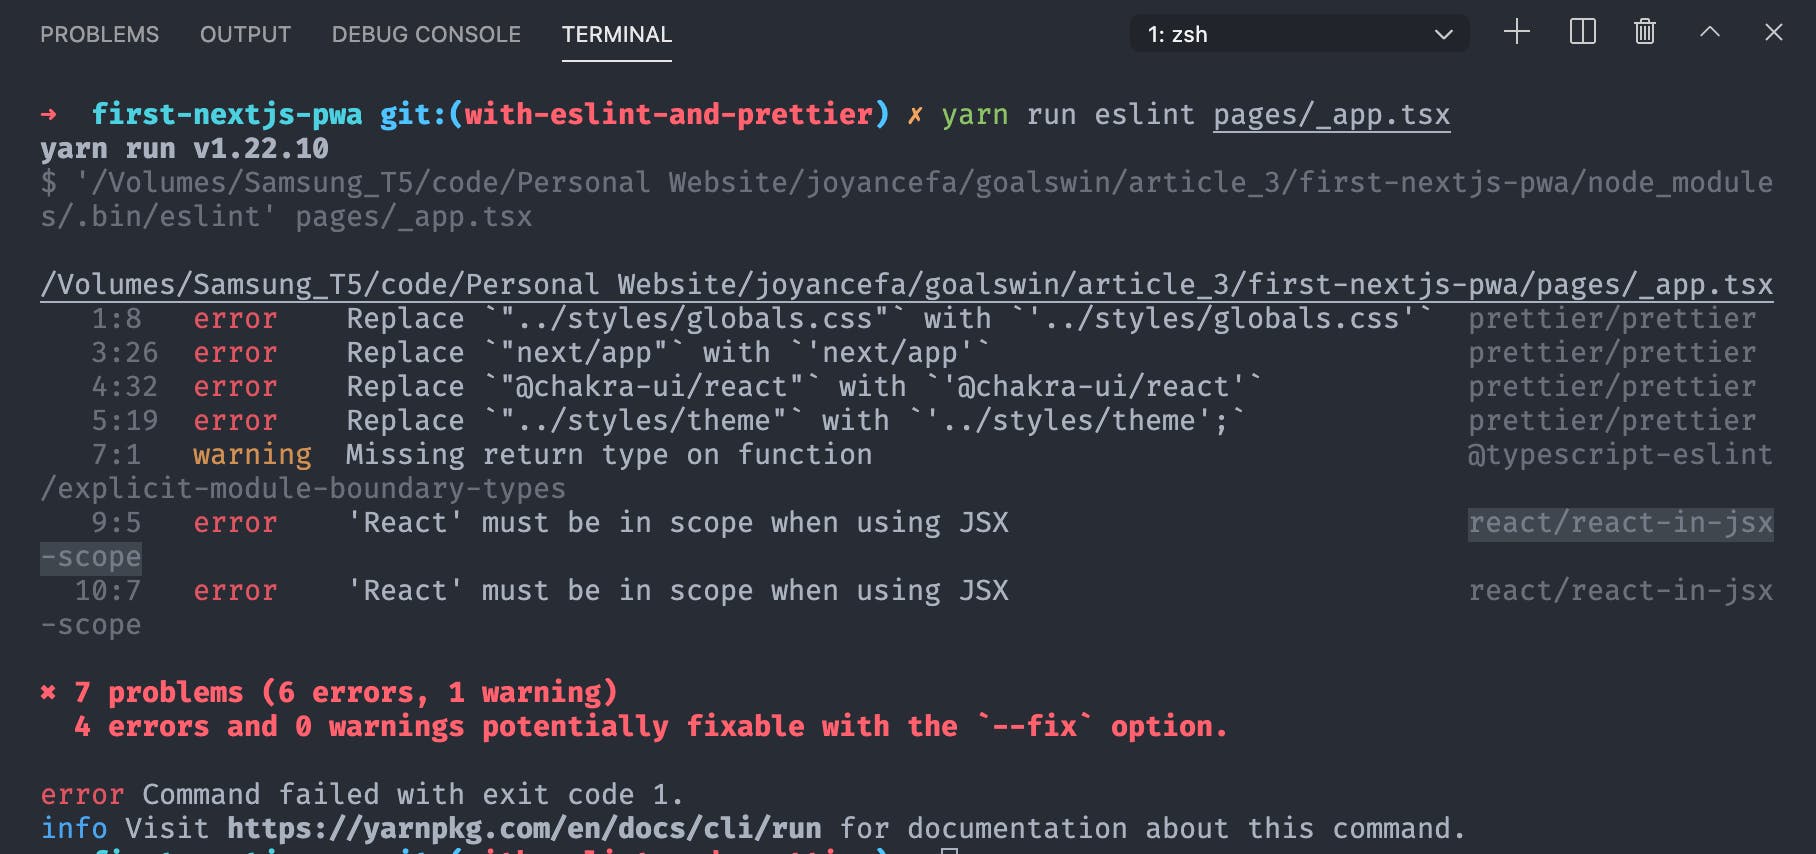
- Fix the errors by :
- adding
import React from 'react';in the file - running the command
yarn run eslint pages/_app.tsx --fix: this will asks ESLint to fix the errors it can fix
- adding
You can ignore the warning
Missing return type on functiondue to the missing return type in the function MyApp ;)
2. Run StyleLint
- Open the file
styles/globals.cssand run the following command:
yarn run stylelint styles/globals.css
If stylelint is well-configured, you should see the following errors in the console:

Fix the errors by running yarn run stylelint styles/globals.css --fix.
3. Configure your package.json file
For a quick and easy way to run ESLint and StyleLint, add the following to your package.json scripts :
"lint-js": "eslint '*/**/*.{js,ts,tsx}' --quiet --fix",
"lint-css": "stylelint ./**/*.css --quiet --fix"
After this, you can :
- find/fix issues in all your ts, tsx, js files by running
yarn run lint-js. - find/fix issues in all your CSS files by running
yarn run lint-css.
Integrate with VSCode (optional)
It is nice to run the commands above and fix/detect issues with your code. However, it's slow and annoying 😝 .
A better solution is to have your IDE shows/fix errors when you save the files.
Let's make VSCode do that for us!
1. Add the following extensions to VSCode
2. Update your VSCode settings
Add the following lines in your settings.json file :
"editor.codeActionsOnSave": {
  "source.fixAll.eslint": true,
  "source.fixAll.stylelint": true
},
"eslint.codeActionsOnSave.mode": "all",
💡 IMPORTANT: Make sure that you don't have any other formatting "on", else there may be conflicts. For example,
editor.formatOnSaveshould be set tofalse.
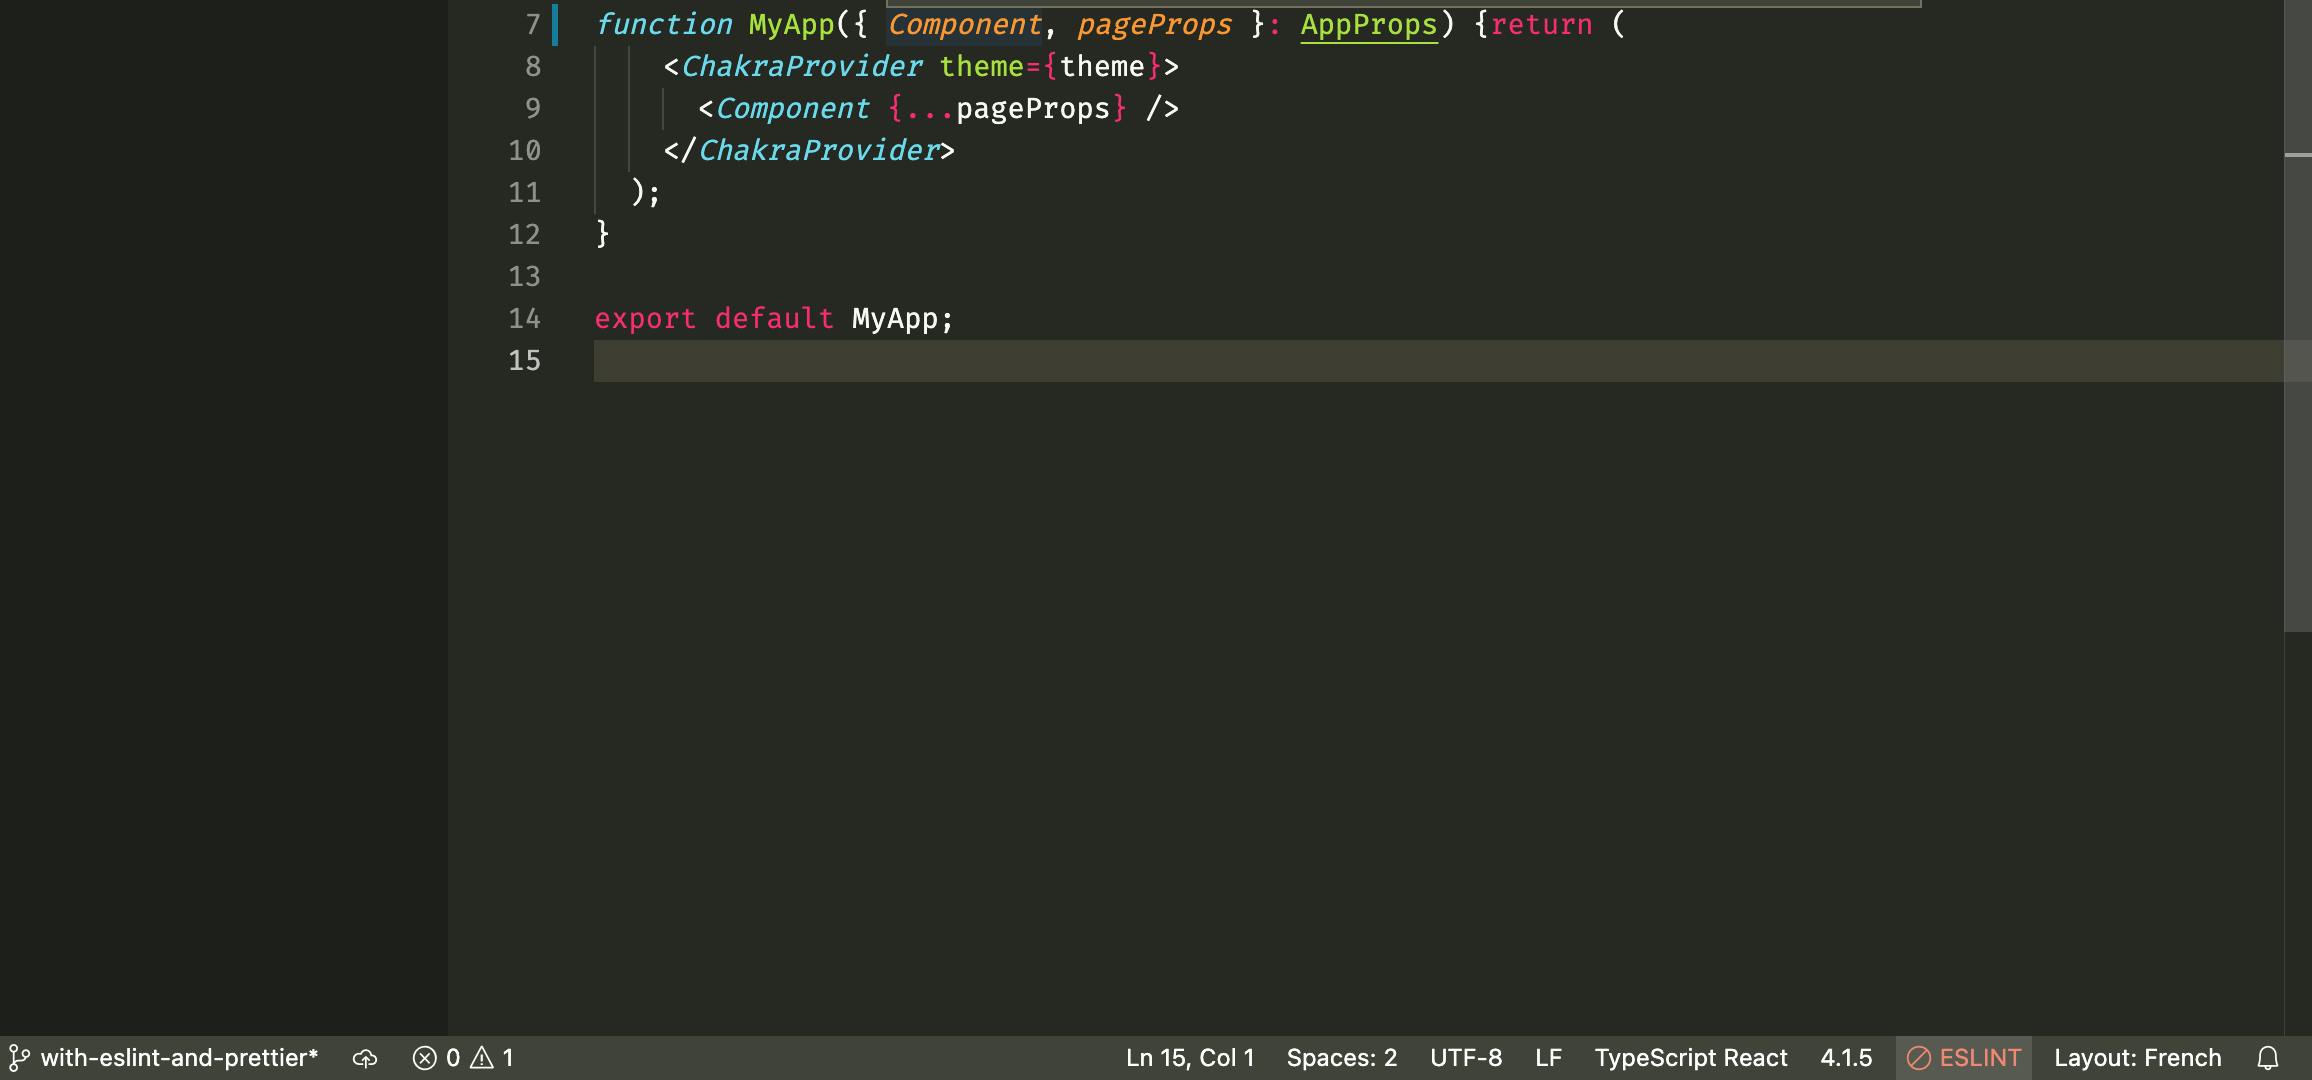
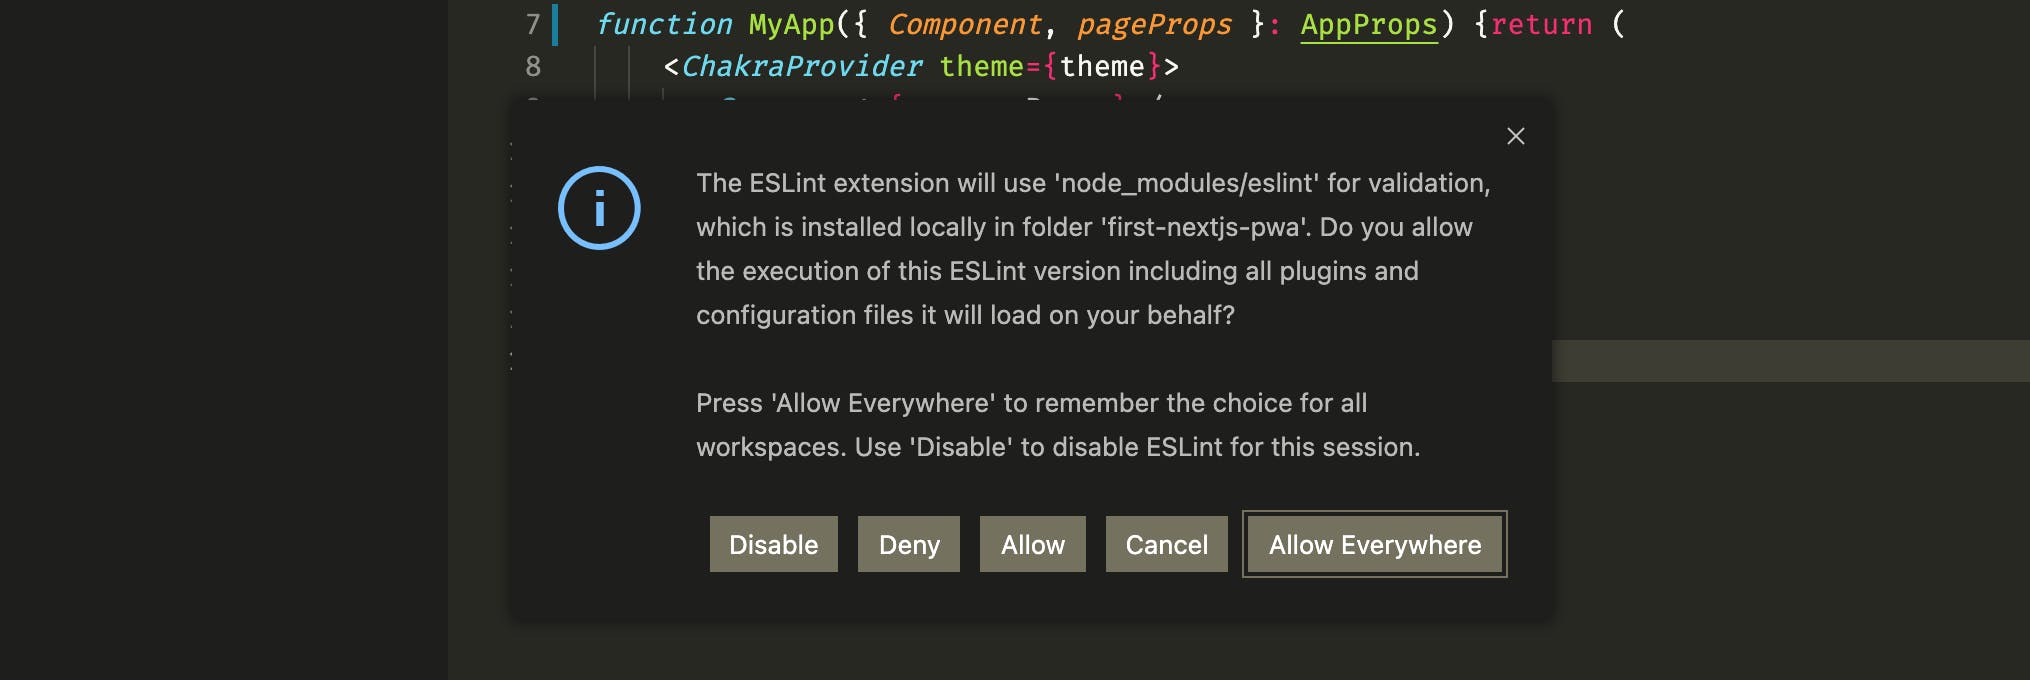
2. Make sure ESLint is enabled on the project
You should see a small ESLint text on the bottom bar. If the text is red, click on it and allow ESLint (see images below).
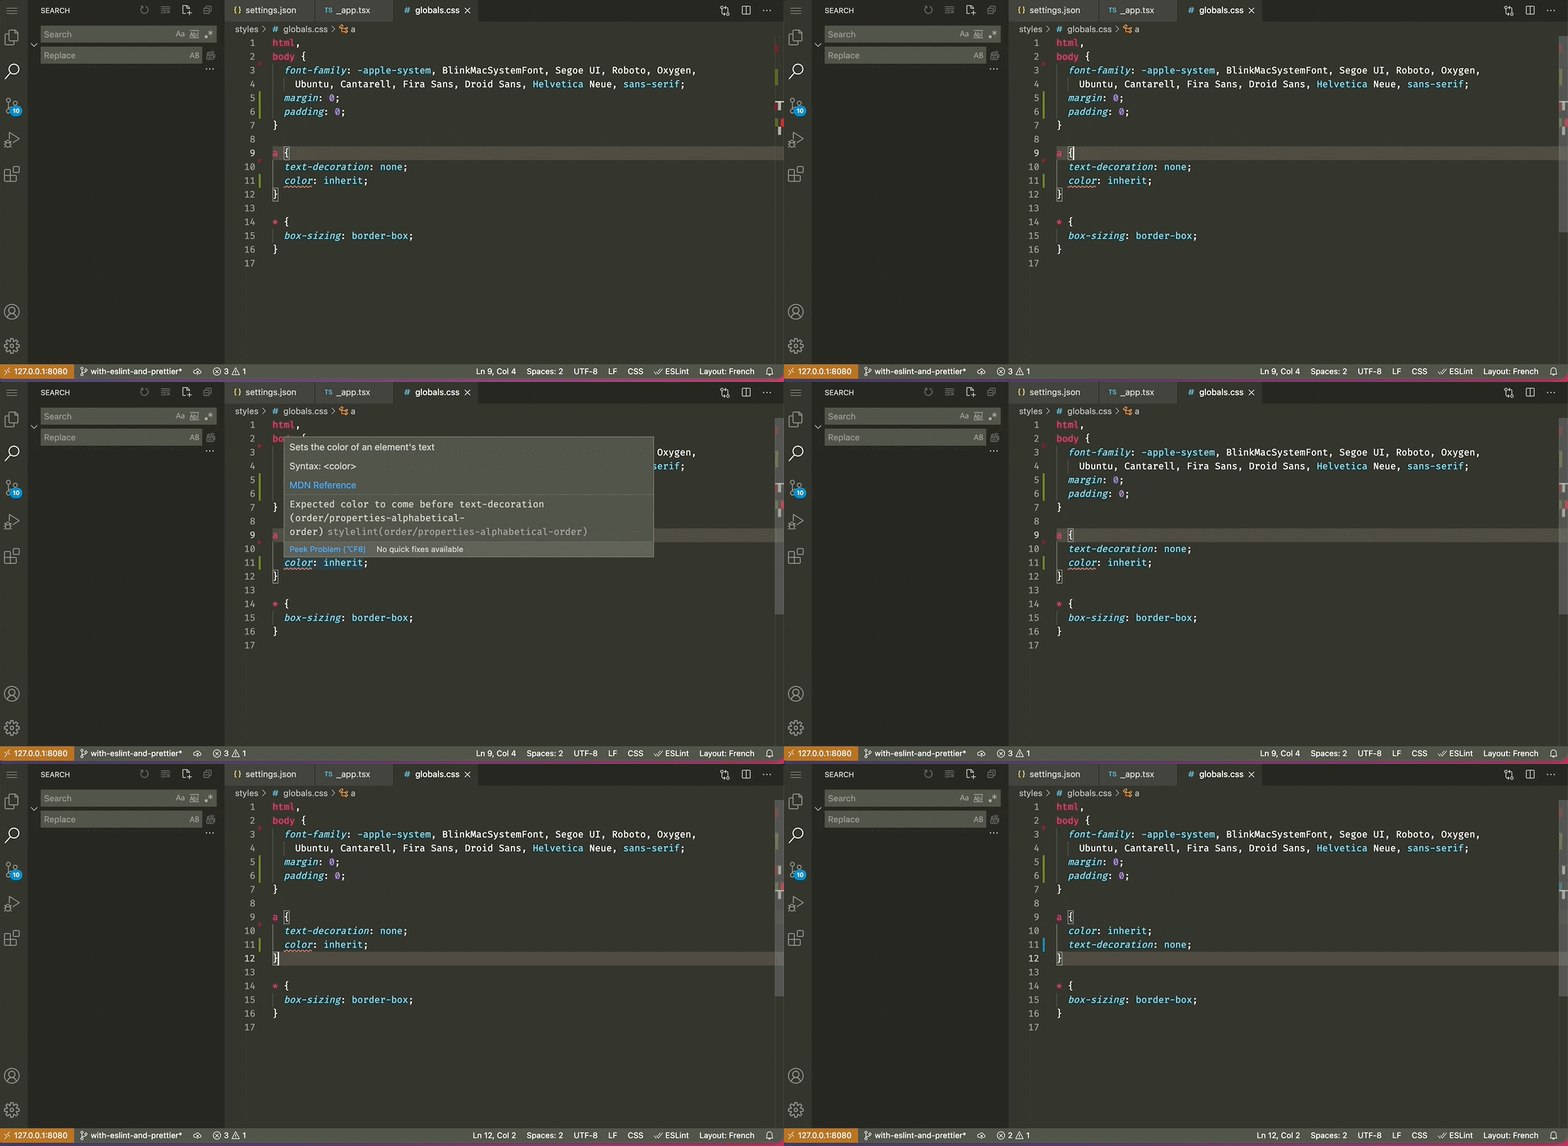
3. Test it
VSCode should now show and fix some of the errors on save 🎉 (demo below).

Conclusion
Well done 💪🏾 : you now have ESLint + Prettier + Stylelint working with your Next.js project. If you have any issues, comment or reach out on Twitter.
And If you liked the article, give it some ❤️.
Find the final source code here 👉🏾 github.com/Joyancefa/first-nextjs-pwa.
Thanks to these great resources

